If you get a lot of requests from people who would like you to knit for them, here's a knitting time calculator that you can send to them, so that you can be recompensed adequately for your time.
(Preview below, click on the knitting time calculator to see the whole thing properly.)
By the way, yes, this is a joke. However, if you want to see what people are submitting, the form results are here.
Monday, January 7, 2013
Sunday, January 29, 2012
Spock hat (free knitting pattern)
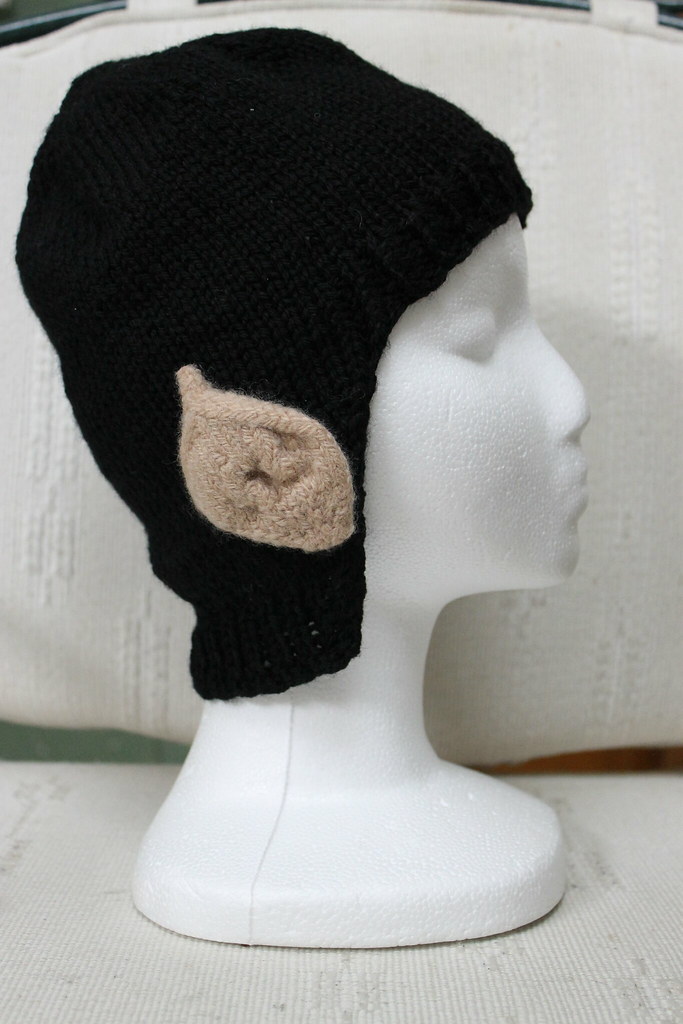
A friend's teenage daughter has been asking for a "Spock Hat" for over a year. Since she asked (very nicely) again at Christmastime, I figured it wasn't a fad that was going to go away, so I thought I'd make one up for her. (It takes me back to being a huge Spock fan when I was her age.)
Note: If you want elf "hair" rather than a Vulcan hat, substitute any other colour for the black yarn.
Links to images for a look at the ear shaping.
* costuming
* neural stimulator
* Quinto ears
________________
The Hat (Knit from top down)
Yarn: Nashua Handknits Creative Focus Superwash (worsted weight), Colour 30 (black)
Needle: US 6 (4 mm) circular needle
Turkish cast-on two stitches on each needle. (Or use your favourite way to start a top down hat.)
Note: Images of the cast-on below are with the yarn I used for the ears, as it's the same beginning, and it's much easier to see light-coloured yarn than black yarn in photos.

Create a magic loop, then, using both ends of the yarn, knit all 4 stitches. (4 stitches around)

Because you used both ends of the yarn, you'll have 8 loops on the needle. Knit all loops as stitches (8 stitches around).

Place a marker at start of round.
Knit 1, YO, all around (16 stitches around)
Knit 1, KTBL the YO (16 stitches around)
(Note: KTBL the YO means knit through back loop of that yarn-over stitch)
K2, YO, all around (24 stitches around)
K2, KTBL the YO (24 stitches around)
K3, YO all around (32 stitches around)
K3, KTBL the YO (32 stitches around)
Continue increasing until you're at K10, KTBL the YO (88 stitches around)
Note: it's easy to manipulate the stitch count if you're using thinner or thicker yarn, or knitting for a child. Just increase to 64, 72, 80, or 96 stitches, instead of 88 stitches around.
Knit for 3 inches (2–2.5 inches if you're making this for a small head or a child)
___________________
Ribbing the front of the hat for the "bangs"
Here's a side view of the bangs.

**
Two stitches before marker, K1 P1
From marker, K1 P1 for 25 stitches
Place second marker
K1 P1, then knit rest of round to two stitches before first marker.
Repeat from ** for one inch
___________________
Bind off the bangs (see note on experimental bindoff below)
After one inch of front ribbing:
Two stitches before marker, K1 P1
From marker, bind off 25 stitches, ending at second marker.
Remove both markers.
K1 P1, Knit to two stitches before end of the row, P1 K1.
From here, you'll work the back of the hat as a flat piece, not in the round.
___________________
Knit the back of the hair
And here's a closeup of the back of the head, showing the shaping of the hairline.

**
P1 K1, Purl to last two stitches, K1, P1
K1, P1, SSK, knit to last four stitches, K2tog, P1, K1
(The "hair" angles backwards, with two stitches being decreased every other row.)
Repeat from ** for two inches. You will have 49 stitches on the needle.
___________________
Begin ribbing for bottom of "hair", to reduce stockinette curling
K1, P1, SSK, ** P1 K1 ** (repeat between ** ) to last 4 stitches
Last 4 stitches are K2tog, P1, K1
P1, K1, repeat to end
K1, P1, SSK ** K1 P1 ** (repeat between ** ) to last 4 stitches
Last 4 stitches are K2tog, P1, K1
P1, K2 ** P1 K1 ** (repeat between ** ) to last 3 stitches
Last 3 stitches are K2, P1
Repeat ribbing stitches for one inch (approx 6 rows)
Bind off.
One more side view photo of the hat.

___________________
Stretchy bindoff
You can bind off normally, or if you'd like to try a stretchy bindoff, here's my experimental bindoff for this project. It's a combination of the regular bindoff and the lace bindoff.
1. Knit two, slip both stitches back to left needle, K2tog
2. Knit 1, Pass rightmost stitch on left needle over the first stitch
3. Knit one, slip both stitches back to left needle, K2tog
Repeat 2 and 3 above
___________________
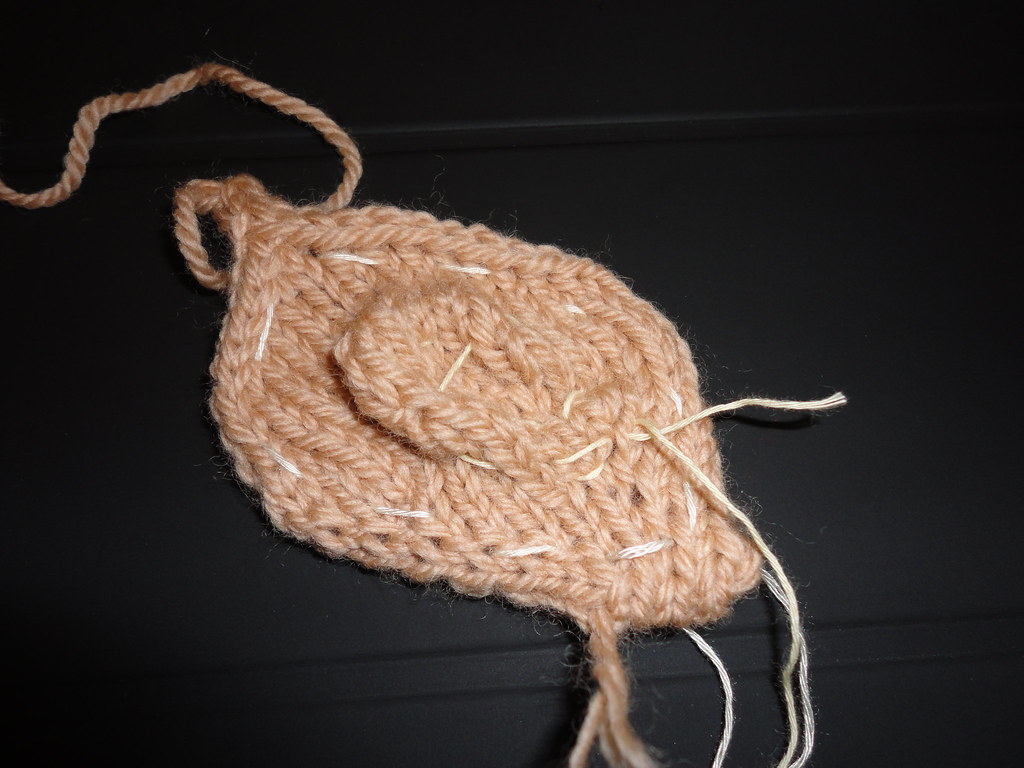
Pointy Ears
Yarn is Purelife organic wool, in "onion", or equivalent feltable wool. This is a DK weight yarn as I wanted the ears to be a little lighter weight. You can substitute worsted weight yarn but the ears will be just a wee bit heavier on the hat. You may also have to fudge your row count by one or two rows, or felt the yarn a little bit more.
Needles I used: US 6 (4 mm)
**Pattern**
Using the Turkish cast-on, make 4 stitches, 2 on each side of your circular needles.
Basic principle: increase to 11 stitches on back of ear; increase to 20 stitches on front of ear
There are 32 rows from the bottom to the top tip of the ear.
It takes 12 rows to build from the bottom to the middle of the ear, then 12 rows to decrease for a regular human ear shape, then 8 rows to build the pointy tip.

The extra stitches in the "front" of the ear are to create extra fabric for shaping into an ear whorl.
My increase chart (yours may vary depending on your row gauge. Remember, your goal is just to get a lot more fabric on the front of the ear, and let the back of the ear control the shape.)
| Row | Back # of stitches | Front # of stitches |
| 2 | 4 | 6 |
| 4 | 5 | 8 |
| 6 | 6 | 11 |
| 8 | 8 | 14 |
| 10 | 9 | 17 |
| 12 | 11 | 20 |
| 14 | 10 | 18 |
| 16 | 9 | 16 |
| 18 | 8 | 14 |
| 20 | 7 | 12 |
| 22 | 6 | 9 |
| 24 | 5 | 6 |
| 26 | 4 | 4 |
| 28 | 3 | 3 |
| 30 | 2 | 2 |
| 32 | 1 | 1 |
RIGHT EAR
Increases on front are K to one stitch before end, M1, K1, on most rounds. You can also M1 in the middle of the ear after row 4.
Increases on back are K1, M1, K to end (no increases on alternate rows).
Here's the back of the year, at the midpoint.

And here's the front of the ear. You can see all the extra fabric bulging upwards.

Decrease rows on front for rows 14-24 are:
SSK, K to last 3 stitches, K2tog, K
Decrease rows on back for rows 14-24 are:
K to last 3 stitches, K2tog, K
As you get past row 24, alternate k2tog or ssk to shape the final point.
Here's the back of the ear, so you can see the shape.

And here's the front of the ear, with a little shaping of the ear whorl.

LEFT EAR
Increases on front are K1, M1, K to end, on most rows. You can also M1 in the middle of the ear after row 4.
Increases on back are K to one stitch before end, M1, K1 (no increases on alternate rows)
Decrease rows on front for rows 14-24 are:
SSK, K to last 3 stitches, K2tog, K
Decrease rows on back for rows 14-24 are:
K to last 3 stitches, K2tog, K
As you get past row 24, alternate k2tog or ssk to shape the final point.
___________________
FINISHING
After bindoff, baste the ear shaping into place.
With fingering or lace weight cotton or acrylic yarn (not sewing thread, which may cut the yarn, and not wool yarn, which may felt itself to the wool of the ear), sew the edges together to secure the ear shaping.
Then manipulate the extra fabric in the front of the ear into a whorl that approximates the inner shape of an ear, and baste that shape into place with the cotton yarn. (See above photo. You only need to build up about 1/4 inch of ear whorl.)
Make two ears, one which mirrors the other. Learn from my mistake and make them at the same time if at all possible, as it's much easier to remember your construction.
Put into hot laundry wash and dry to felt the ears. Bonus points: Ask your husband to "find your ear" when he brings up the laundry basket.
Here are two ears together, one pre-felting, and one that's been felted down.

Put hat on, and then attach ears to hat in approximate location of your own ears.
Sew in ends.
Wear with geek pride.
Friday, August 5, 2011
hangover
Yep, I am suffering from a Sock Summit hangover. I'm a little out of sorts. There's stuff all over the place and chores to be done but all I want to do is crawl into bed and pull the covers over my head.
I made it home in one piece with Gladys' luggage and her shiny new shoes plus a stroller that got left behind in Portland. It was a leisurely drive home with a stop in Centralia for the outlet stores (didn't buy much), a brief stop in Marysville for a late lunch, and long break in Bellingham to pick up a spinning wheel, a split bearing for my Traveller (which I ended up swapping with the Traditional because the new one was a smidge too big), and a little Finn fiber.
I'm sure you're dying to see what I bought.
I shopped for other people and this is their loot:

This is my yarn purchase plus a set of carbon fiber dpns:

And this is my fiber haul (approx. 3.5lbs):

Most of it is Polwarth except for the Sheep2Shoe kit which is superwash merino and the pencil roving. The white blob is the Finn. On the far left was my biggest splurge - 50% camel/50% silk. I couldn't resist - it's sooooo soft.
My door prize:

And here's the spinning wheel that I picked up for my niece:

It's an Edammertje and a Dutch made wheel. From what I understand, it's a competitor to Louet. The company is no longer in business so if it ever needs repairs, etc., I will have to use parts from other spinning wheel makers. I've cleaned it up and oiled it. It treadles very smoothly but 4 out of the 6 bobbins are incredibly noisy.
There are a few things missing from the pictures like my Sock Summit swag, a coupla t-shirts that I bought hubby from the Saturday market, See's candies, goodies from my Fabric Depot trip, and some clothes that I bought. I didn't exceed my duty free limit ($750) but I was pretty darned close. Phew!
Saturday, July 30, 2011
Sock Summit Day 3
Today was my last day of classes. I had sooooo much fun in my CSM (circular sock machine) class. We made straight tubes, short row heels/toes, and learned how to get the ribber working and switch the needles around. I did not end up with a wearable sock but I couldn't resist trying on my practice piece.

As it happens, two of my practice heels are exactly the length of my foot so I may actually be able to salvage a sock out of my 5 ft long tube.

The CSM wasn't scary to use. A bit tricky at times but not unmanageable. By the end of the 3 hour class my hands were covered in black machine oil. My finger nails look like they belong to a grease monkey rather than a knitter.
I realized this morning that I didn't have my picture taken with any knitting celebrities (aside from Gladys). So I tracked down someone famous and begged for a picture.

This is Caro from splityarn. She's an awesome crafter. I know Caro before she became famous. We used to work together back in the day when we both had desk jobs.
In the afternoon, I showed up at Gladys' lecture with my cow bell and I'm still alive to tell you about it. The lecture was a lot of fun. Many people were inspired and I believe there was a mini stampede to several booths to stock up on pooling yarn. I might've been one of them even though I said I wouldn't do it again.

So that's it for classes. I'll head back to the convention center to pick up my spinning wheel and my door prize!!! Wonder what I won.
Friday, July 29, 2011
postcard from Sock Summit 2011
We and IT are here.

Sock Summit has officially started. Gladys is having a great time teaching and I'm having a great time learning. We definitely feel like we've been transported to another world:

If you don't get the reference, look it up! BTW, the show - in all it's incarnations is filmed just a few kms from where I live.
We are both enjoying the shopping ;) I will take photographs of my stash when I get home but just trust me when I say, "WOW!". As you can probably guess, most of it is spinning fiber :) While I did bring my spinning wheel, I do not have it to try out my new fiber. It is with one of the Fleece to Foot teams and it was be participating in Sunday's competition.
Tomorrow is my last class and Gladys' lecture. My supplies are packed for class and so is my cow bell for the lecture. She is going to KILL me.
Sunday, July 24, 2011
finished
I've crossed the TdF finish line!!! A purple jersey (don't like yellow and I look horrible in it) for me :)
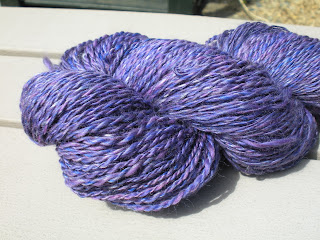
This is a little skein of some mystery stuff that Gail gave me. I've only got 228 yds so I'm not sure what I'll make with it.
After many weeks of wheel searching, I think I've found one for my little niece. Hopefully, it will still be avail on my way back from Sock Summit. Only 4 more sleeps!!!!

Ricky sez, "zzzzzzzzz".
Subscribe to:
Posts (Atom)